A while back I built my first mechanical keyboard, which I called the Zo64 (because it has 64 keys) and documented in some detail here. I was very happy with how it came out, but I had also learned some things during its construction, and I was already thinking about how to make the sequel even better. I have multiple computers here, so I knew I was going to need at least one or two additional keyboards anyhow.
Way back in October I had ordered a couple of Banana Split 60 PCB-and-plate kits from TheVan Keyboards. This was the second production run with some improvements over the original kit (which I never had an opportunity to build). When these boards finally arrived, I had the rest of my parts already gathered and was ready to begin building.
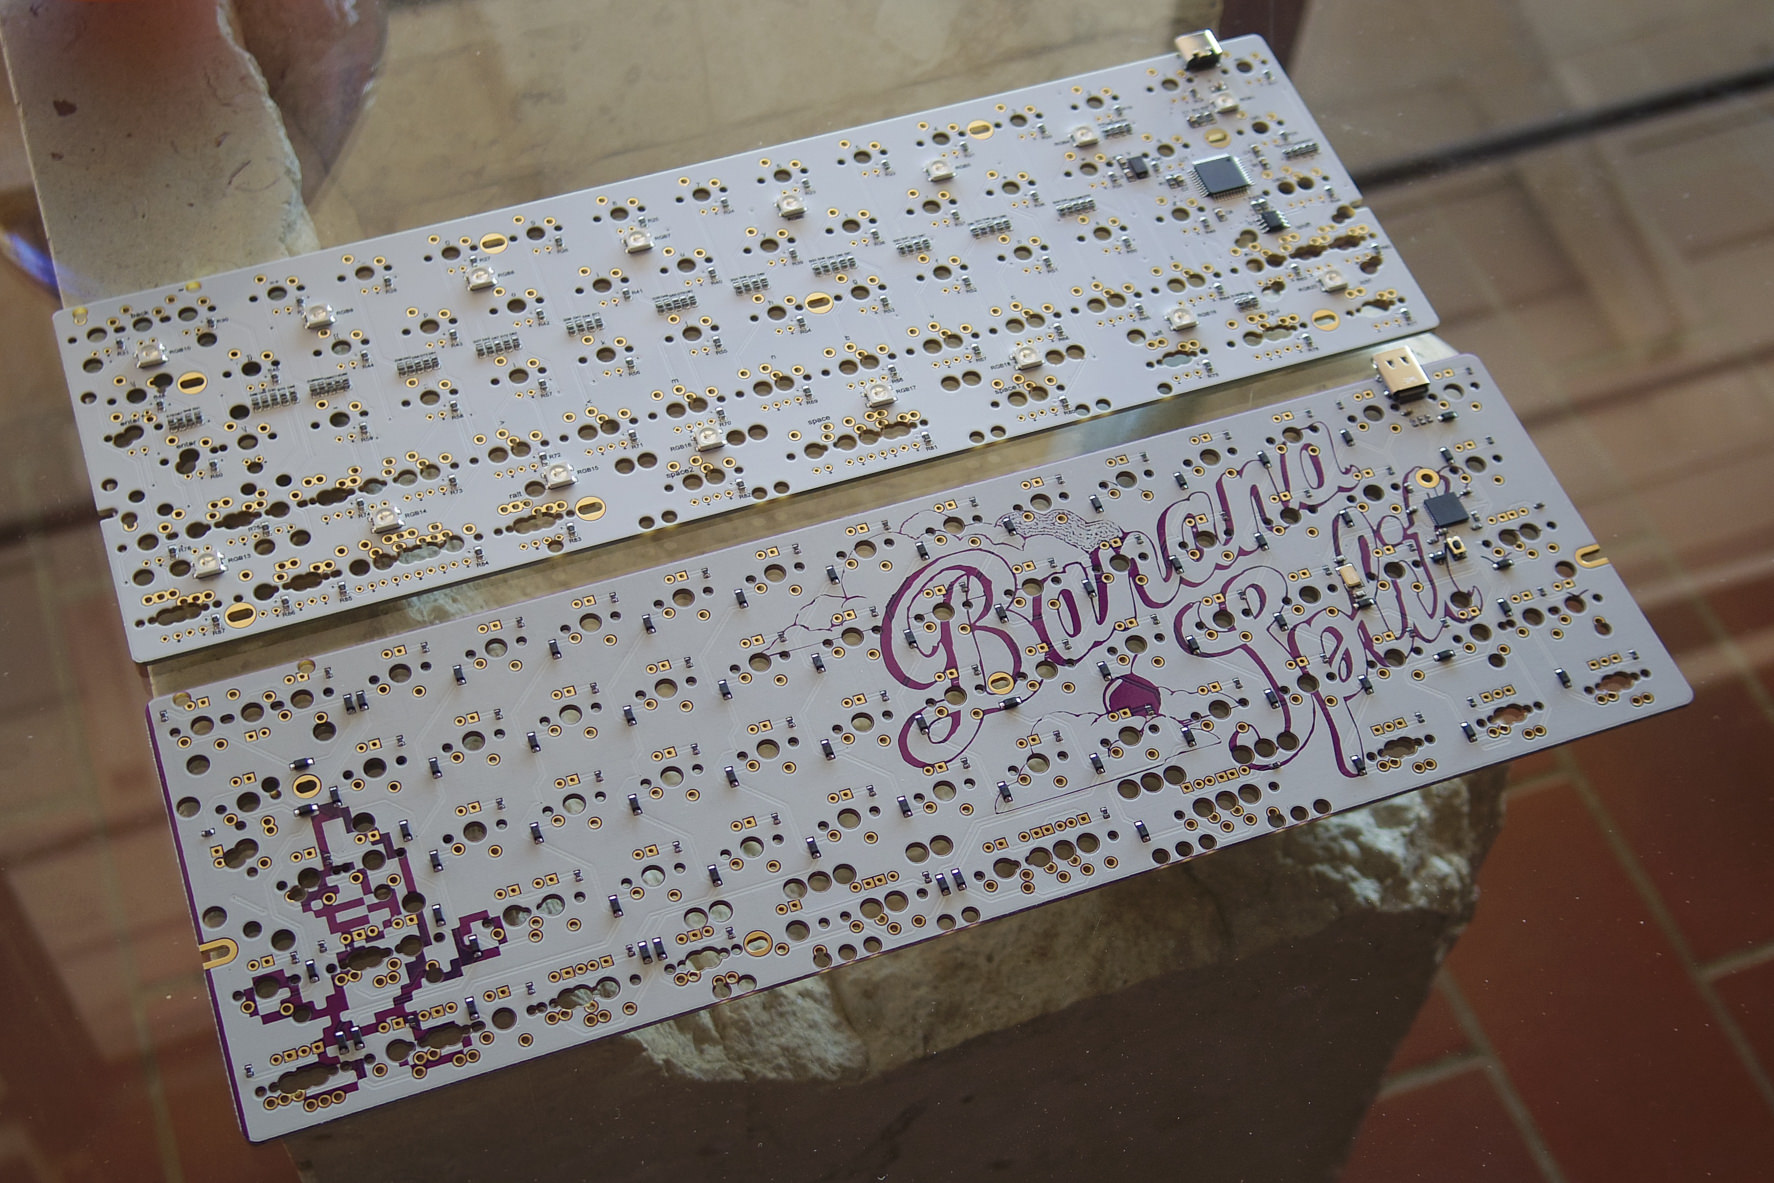
I had also received a DZ60 REV. 2.0 board, USB Type-C variant, and I compared it side-by-side with the new Banana Split boards before I began. I have been informed that there will be no further production runs of Banana Split 60, since the producers of it felt they can't compete with the Taiwanese "clone". I think that's unfortunate, since the DZ60 is not really an exact copy, and the two products do have some different features to distinguish them. I was hoping to see both of these products continue to evolve in parallel.
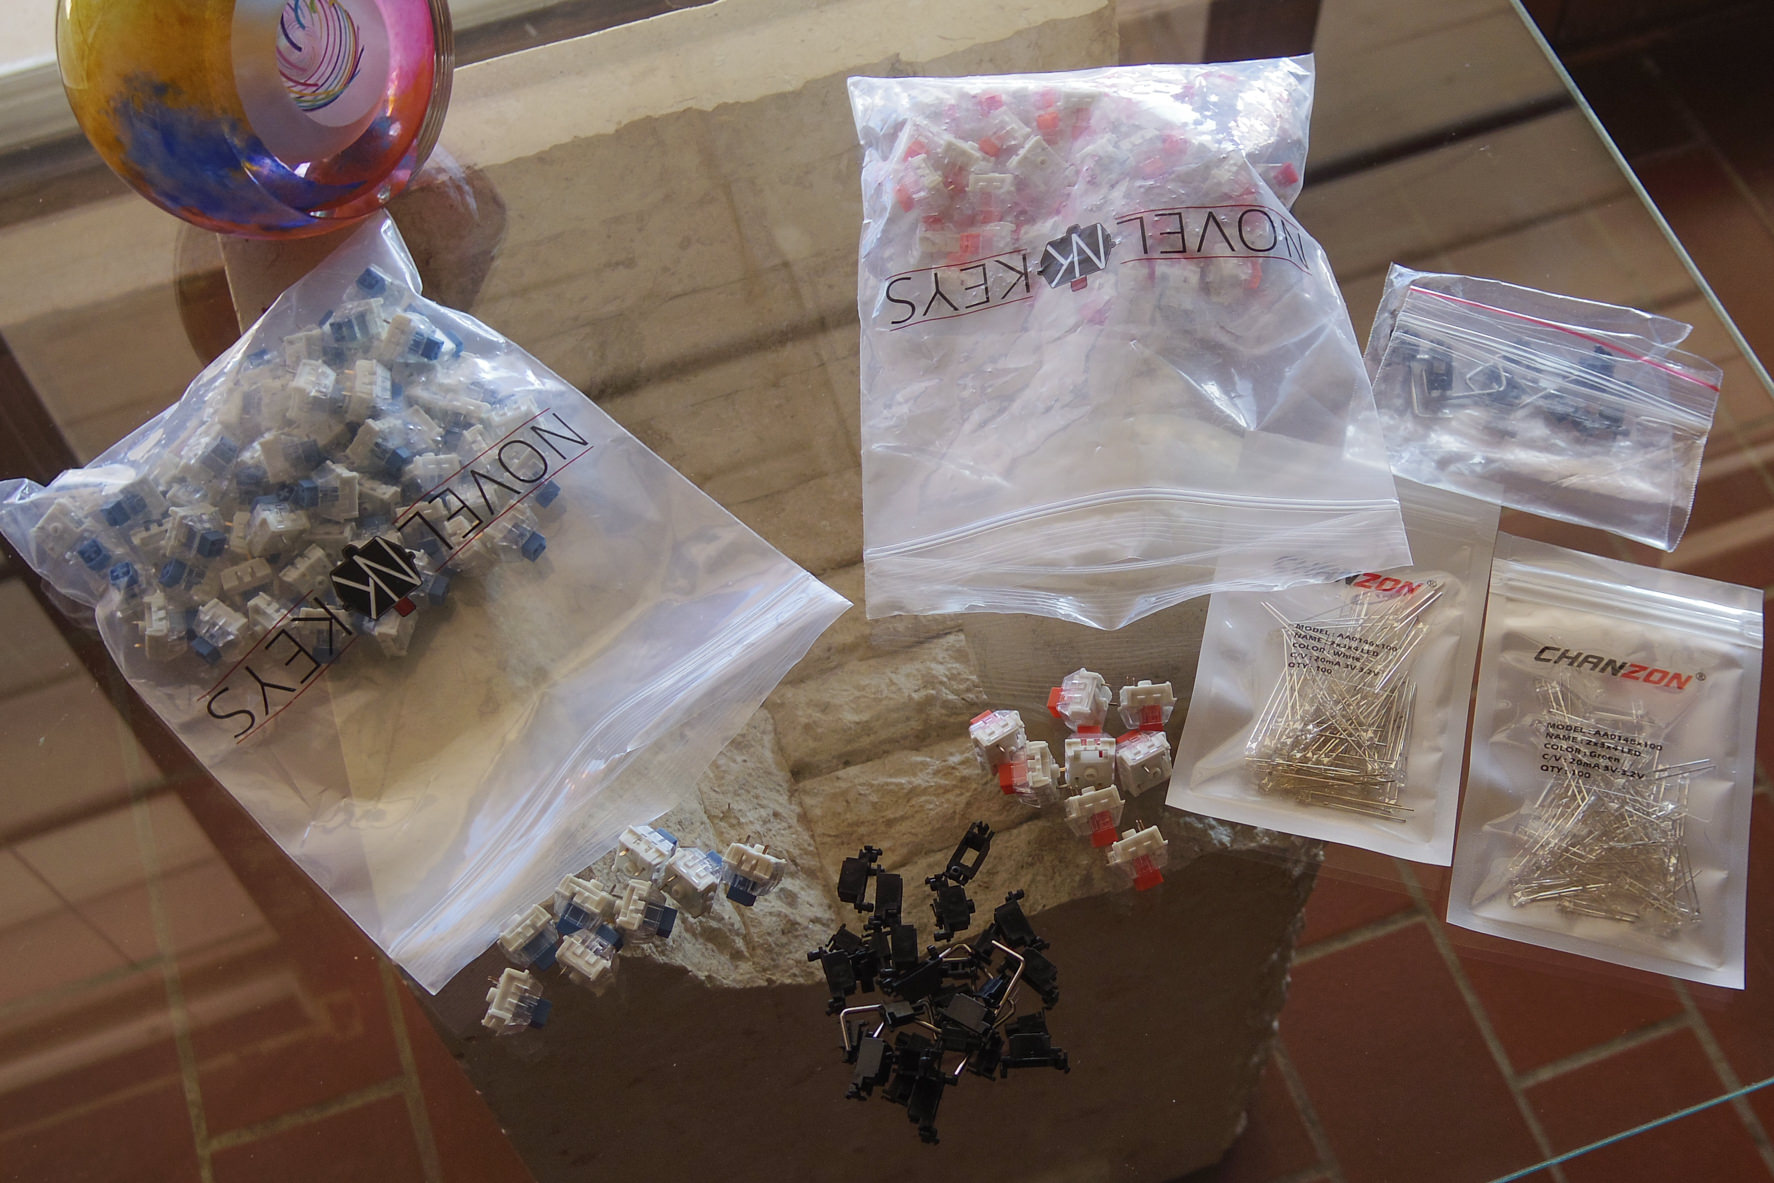
When I built the original Zo64 (on a DZ60 PCB), I used Kailh BOX White switches. I found those very nice, but somewhat lightly sprung for my taste. I later rebuilt that board using slightly heavier Kailh BOX Pale Blue switches, and I felt they were just about the perfect clicky switch for me. This time I would be building my two Banana Splits, and I would use BOX Pale Blue switches in one and BOX Burnt Orange (tactile, non-clicky) in the other. I'd heard that some of these latter switches were showing up with defective, twisted stems, so I bought extras. I examined them closely and culled out only four switches that appeared to be slightly askew.
I also took some pains to secure authentic Cherry stabilizers this time. I did not "clip" them as a lot of people do, but I did carefully trim away the traces of plastic flashing material from the housings, lubricated them, and then I secured them to the PCB using hot glue. I'm happy with the key action I got from using these methods.
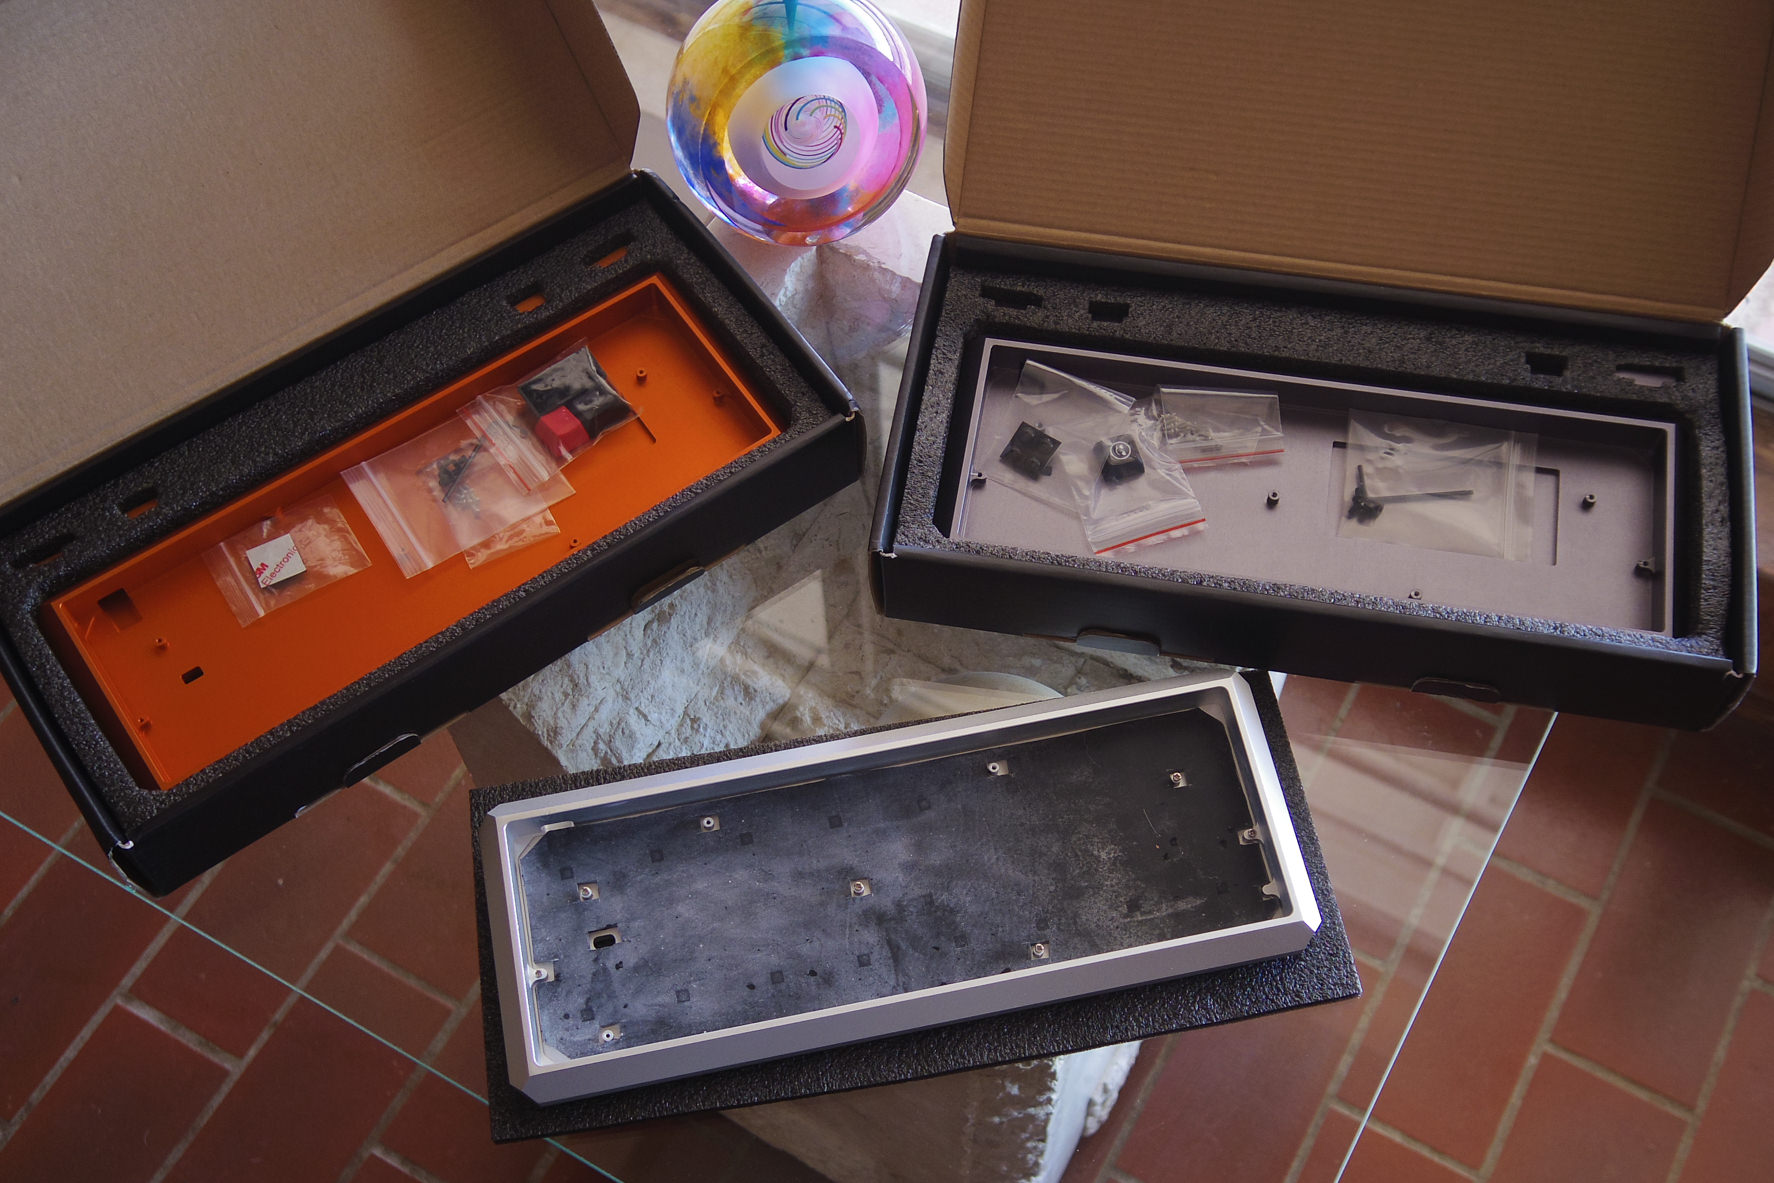
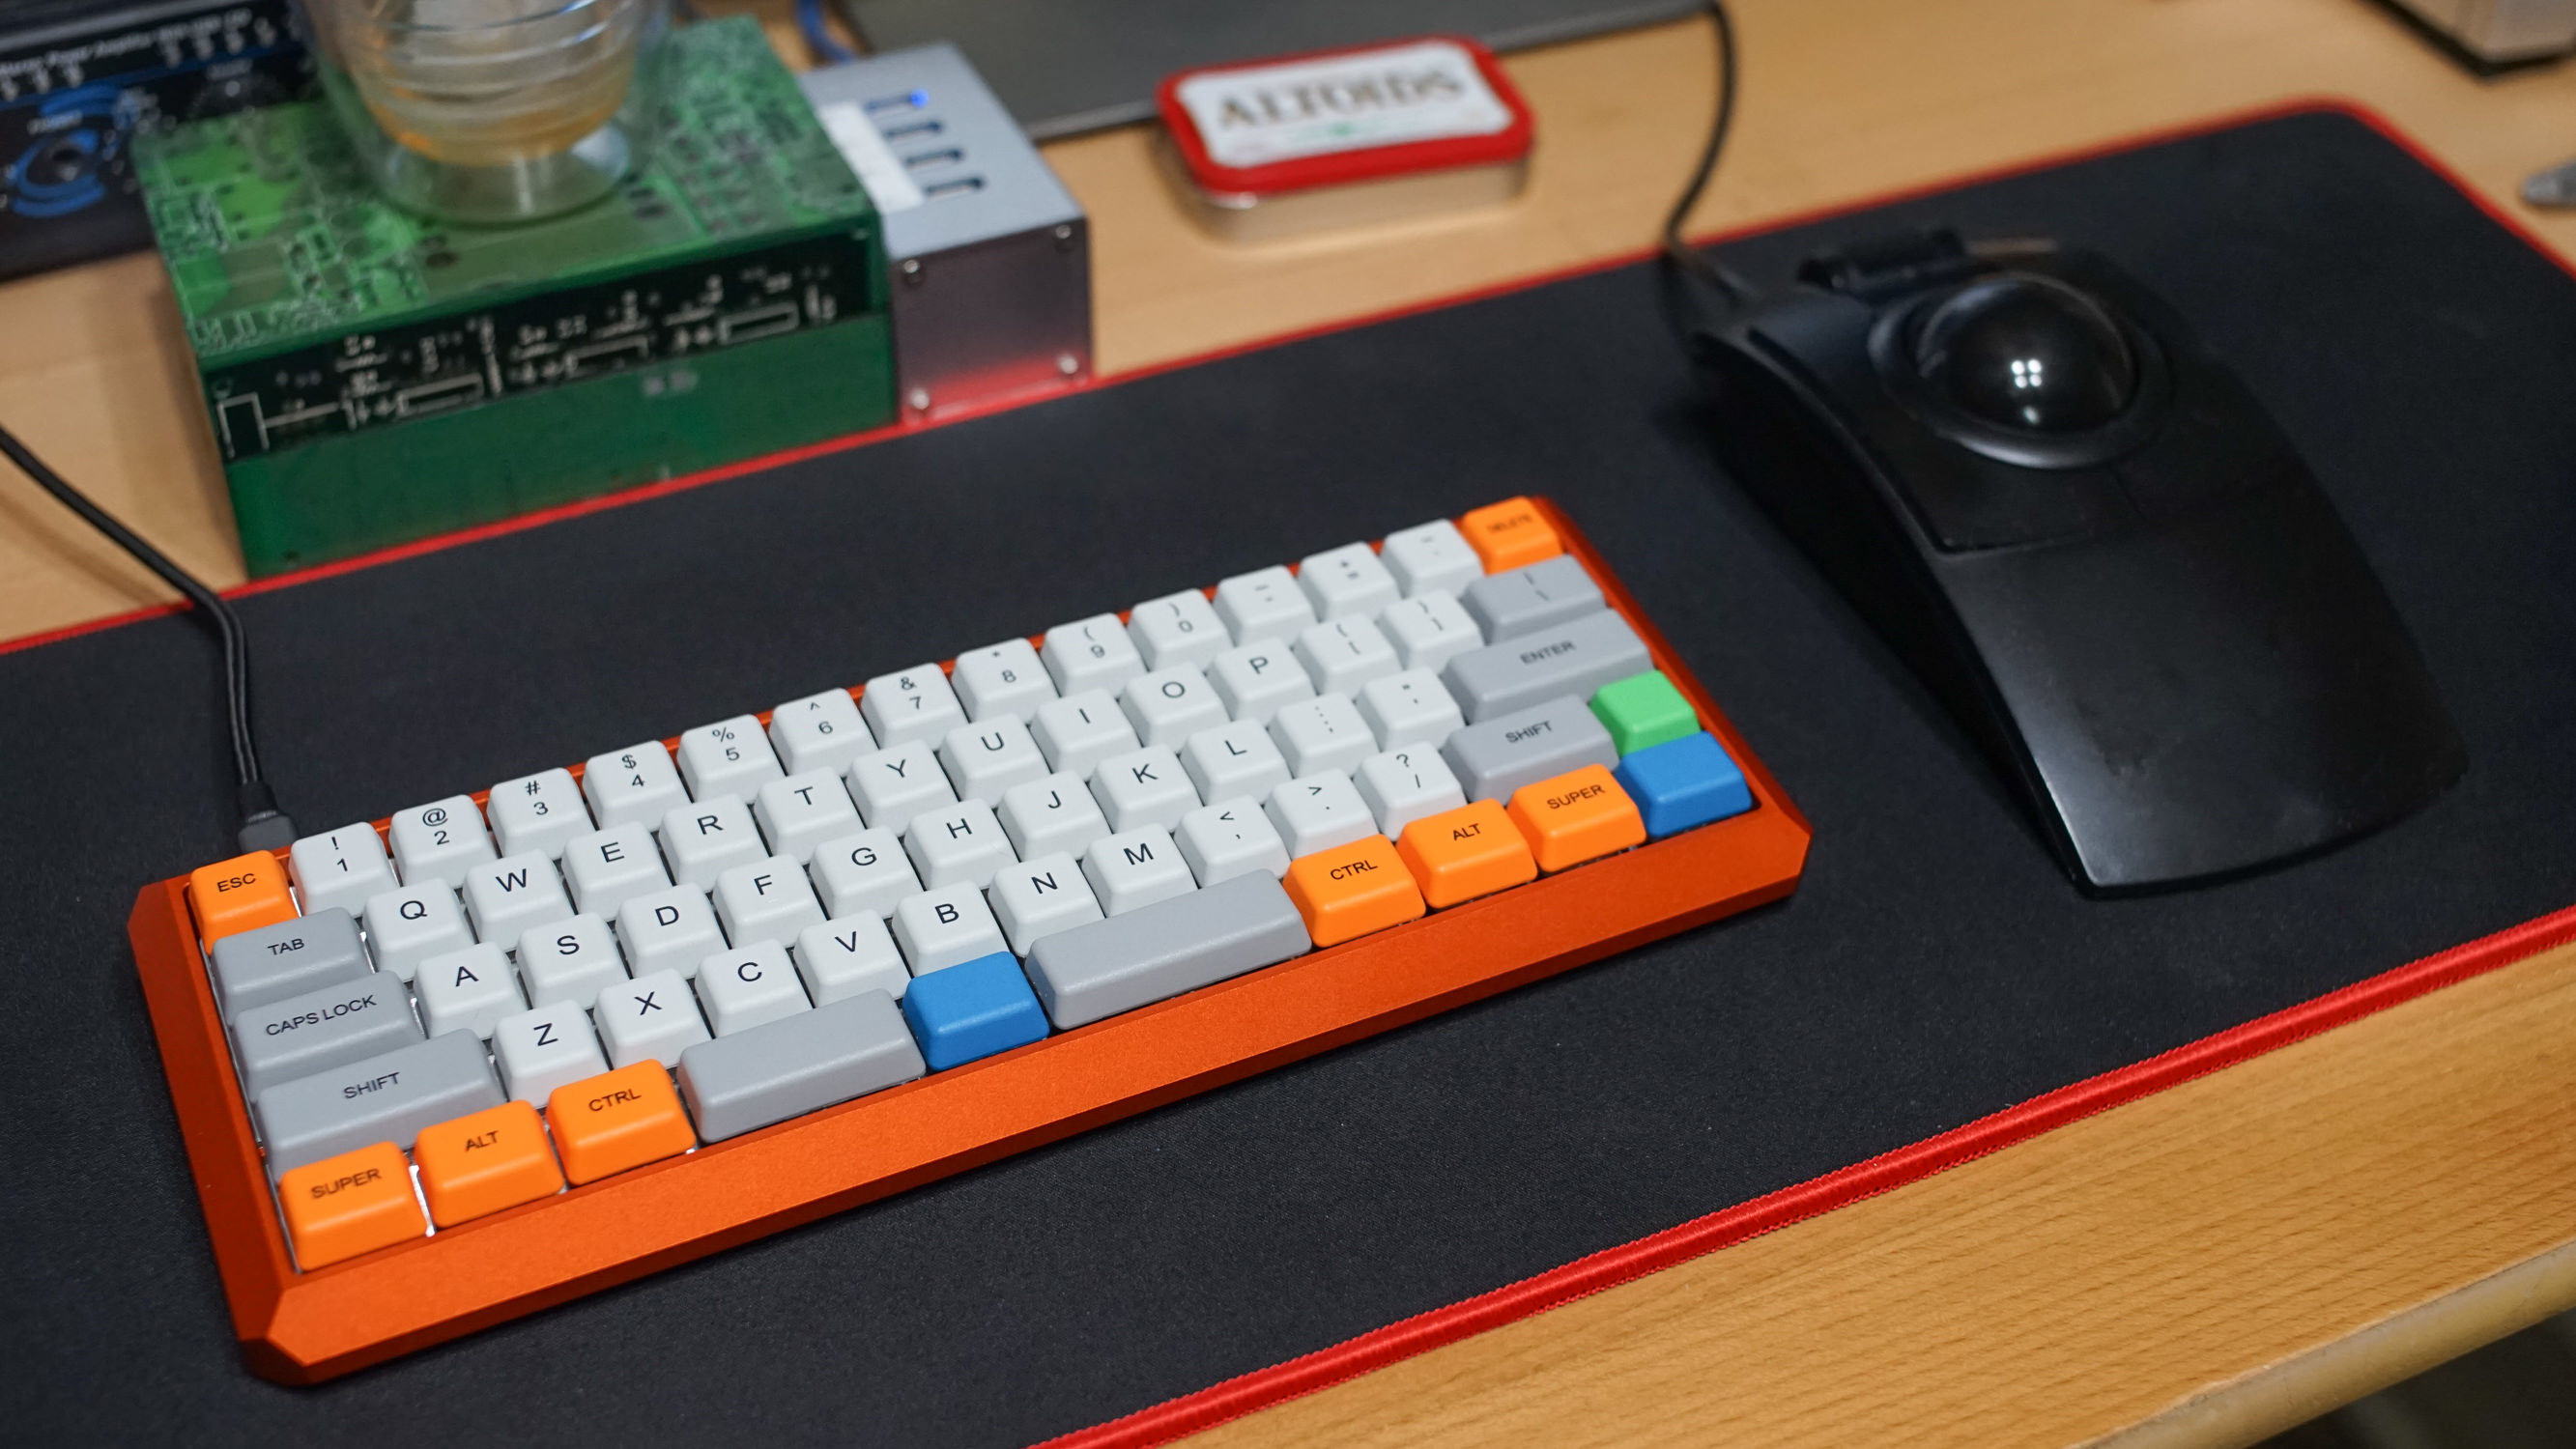
The Team Wolf case that I used in my original build was good, but this time I had the opportunity to get the new 5-degree aluminum case from KBDfans. I was so impressed with the first one that I received (in silver) that I ordered two more, one orange and one dark gray. These cases are a perfect match for my own style and preferences, and I couldn't recommend them highly enough. I also secured some sheets of 1/8th inch thick 40 duro (very soft) Sorbothane material. These I cut to fit in the bottom of the cases. It's very sticky stuff, so after sticking down each sheet into the case, I next dusted it with talcum powder to prevent them from gluing my PCB in place! Sobothane is an amazing material for dampening vibrations and suppressing resonance inside the case. It makes these keyboards feel-and-sound as solid as an anvil. It is a bit expensive, and it has to fit the case properly. If it's not pressing up against the back of the PCB, it won't produce the full, desired effect. Luckily, the 1/8th inch thickness proved perfect for these cases. I only had to fill in one recessed area with some sheets of card stock. (You should also be aware that Sorbothane can discolor anodized aluminum, so don't let it come in contact with the outside of the case!)
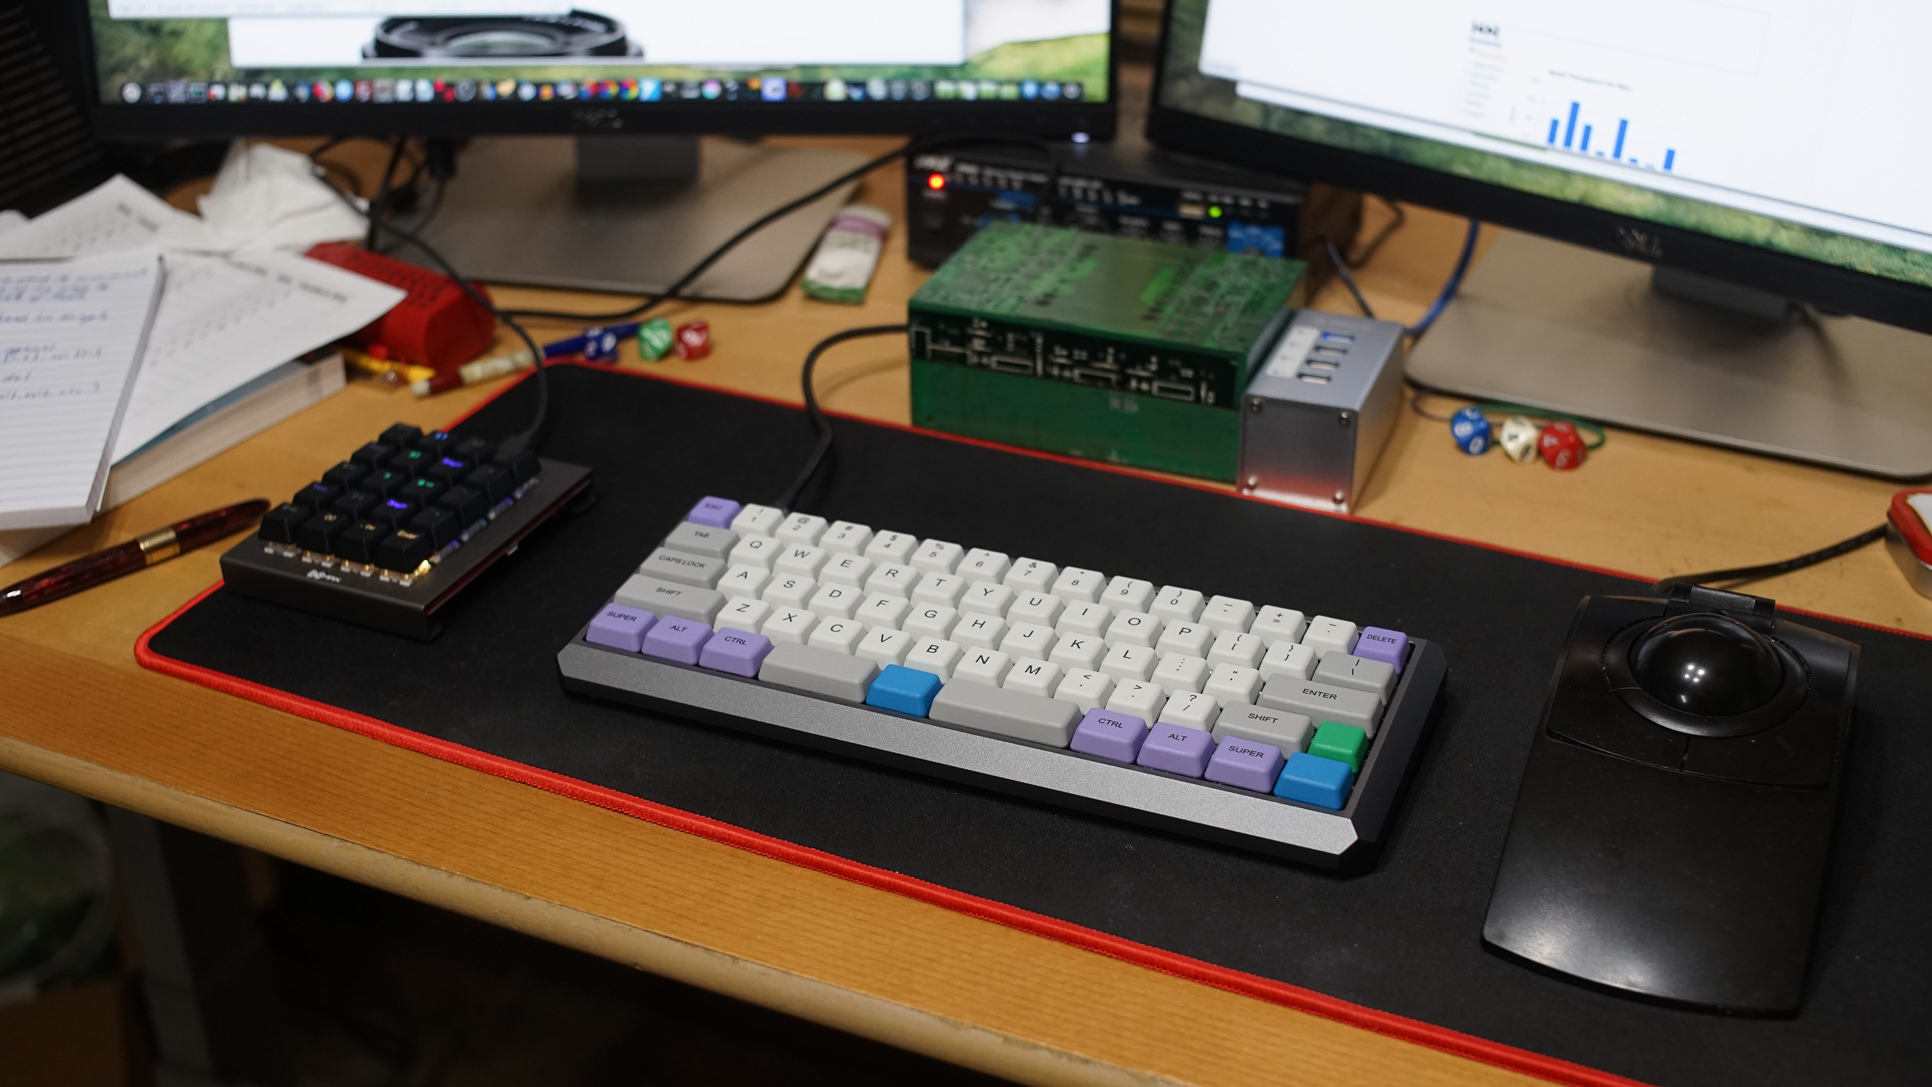
The major motivation behind building the Zo64 was to extract maximum advantage from a split spacebar in a 60% form-factor keyboard. The Zo65 only makes a couple of minor tweaks. Fn-CapsLock now works as an Enter key, which makes it easy to navigate lists and select items with one hand. Forward delete is now Fn-RightSpace instead of Fn-LeftSpace, because it's slightly easier to hit when editing. (And yes, Backspace and Delete still work in the upper-right corner too.) Finally, I split the right Shift key—which is why the Zo65 now has 65 keys—and I made the new key into a dedicated Compose key.
Wait, Compose? What's that?
I've been using the Mac for quite some years now, but I never really got the hang of typing special characters using the "Option" (or Alt) keys. I eventually learned a couple, such as how to get ellipses (Option-semicolon) or n-dash (Option-dash) or m-dash (Option-Shift-dash), but that was about the extent of it. When I moved to Linux, even those few key combinations didn't work anymore. So, how do you get special characters in Linux? The best way I found was to set up a "Compose" key. I can tap Compose followed by a mnemonic sequence of keys to produce many special characters. For example, to get ellipses (…) I would type: Compose, period, period. For m-dash (—): Compose, dash, dash, dash. For a copyright symbol (©): Compose, o, c. Because it's a C in a circle, right? Most of these sequences are easy to mentally pick up and remember. This functionality is built into Linux, but there are also free utilities (such as WinCompose) that can add it to Windows.
In Linux keyboard layout options you can select the key that you want the system to read as Compose. I chose the "Menu" key, since it's really otherwise useless in Linux (and, arguably, in Windows as well). Then I programmed my new key on the Banana Split to send a KC_APP code to the computer when pressed. (Confusingly, KC_APP is the code for the Menu key, while the KC_MENU code is a relic from some earlier standard that was never widely adopted. If you put KC_MENU in your layout, it won't do anything.)
Although I wanted my dedicated Compose key, and I got one, there were compromises involved. For my original Zo64 build I had a custom keycap set printed by WASD with all my secondary legends. This would not be practical with the split-rightshift layout. The sets they sell don't have an OEM profile 1.75u right-shift key! A Caps Lock key would be the right size, but it's from row 3, and it wouldn't be contoured quite like the rest of the keys on row 4. I'm just enough of a perfectionist that I knew this would never stop nagging at me. I looked for keycap alternatives.
I had already experimented some with G20 profile keycaps for my spacebars and my bottom-row function keys. The advantage of G20 profile is that it has rounded edges, and the spacebar is the same cross-section (flat topped, not concave) as every other G20 key. I also knew that PMK have a service that custom-prints G20 keycap sets with dye sublimation on PBT plastic. Their service is not as flexible as WASD, in terms of colors and custom legends, and every key that deviates from the standard set costs extra. However, this would allow me to easily cover the Zo65 layout, and losing all those secondary legends gives the keyboards a cleaner overall look. (It's not like I'm going to forget these key assignments now!) Also, it was an opportunity to give a full G20 set a try.

YES. Yes, I know that G20 profile is not popular and is actively disliked by many! I guess I'm a contrarian at heart, because all the criticism just made me feel more determined to give it a spin. And what I found is that... It's different. I'd heard G20 was aimed only at gamers, that it was bad for typing, but I'm still averaging over 90 WPM in TypeRacer.com. Because the key tops are flat, there is less tactile feedback to indicate when your fingers are drifting out of position and starting to hit the keys off-center. On the other hand, the key tops are so much larger that it doesn't matter if you hit them a bit off-center. I also find the rounded edges of these keys make them more comfortable when typing fast, and I do like the homing bar on F and J. (The scooped homing keys of DSA and SA just don't work for me.) Bottom line... G20 looks great, and I find it perfectly OK to type on, and I'm happy with it.
Oh, and for those who say that G20 keys look soft-and-rubbery, or that they look like candy, well... They're hard and inedible just like any other keys made from PBT. Sorry to disappoint you.
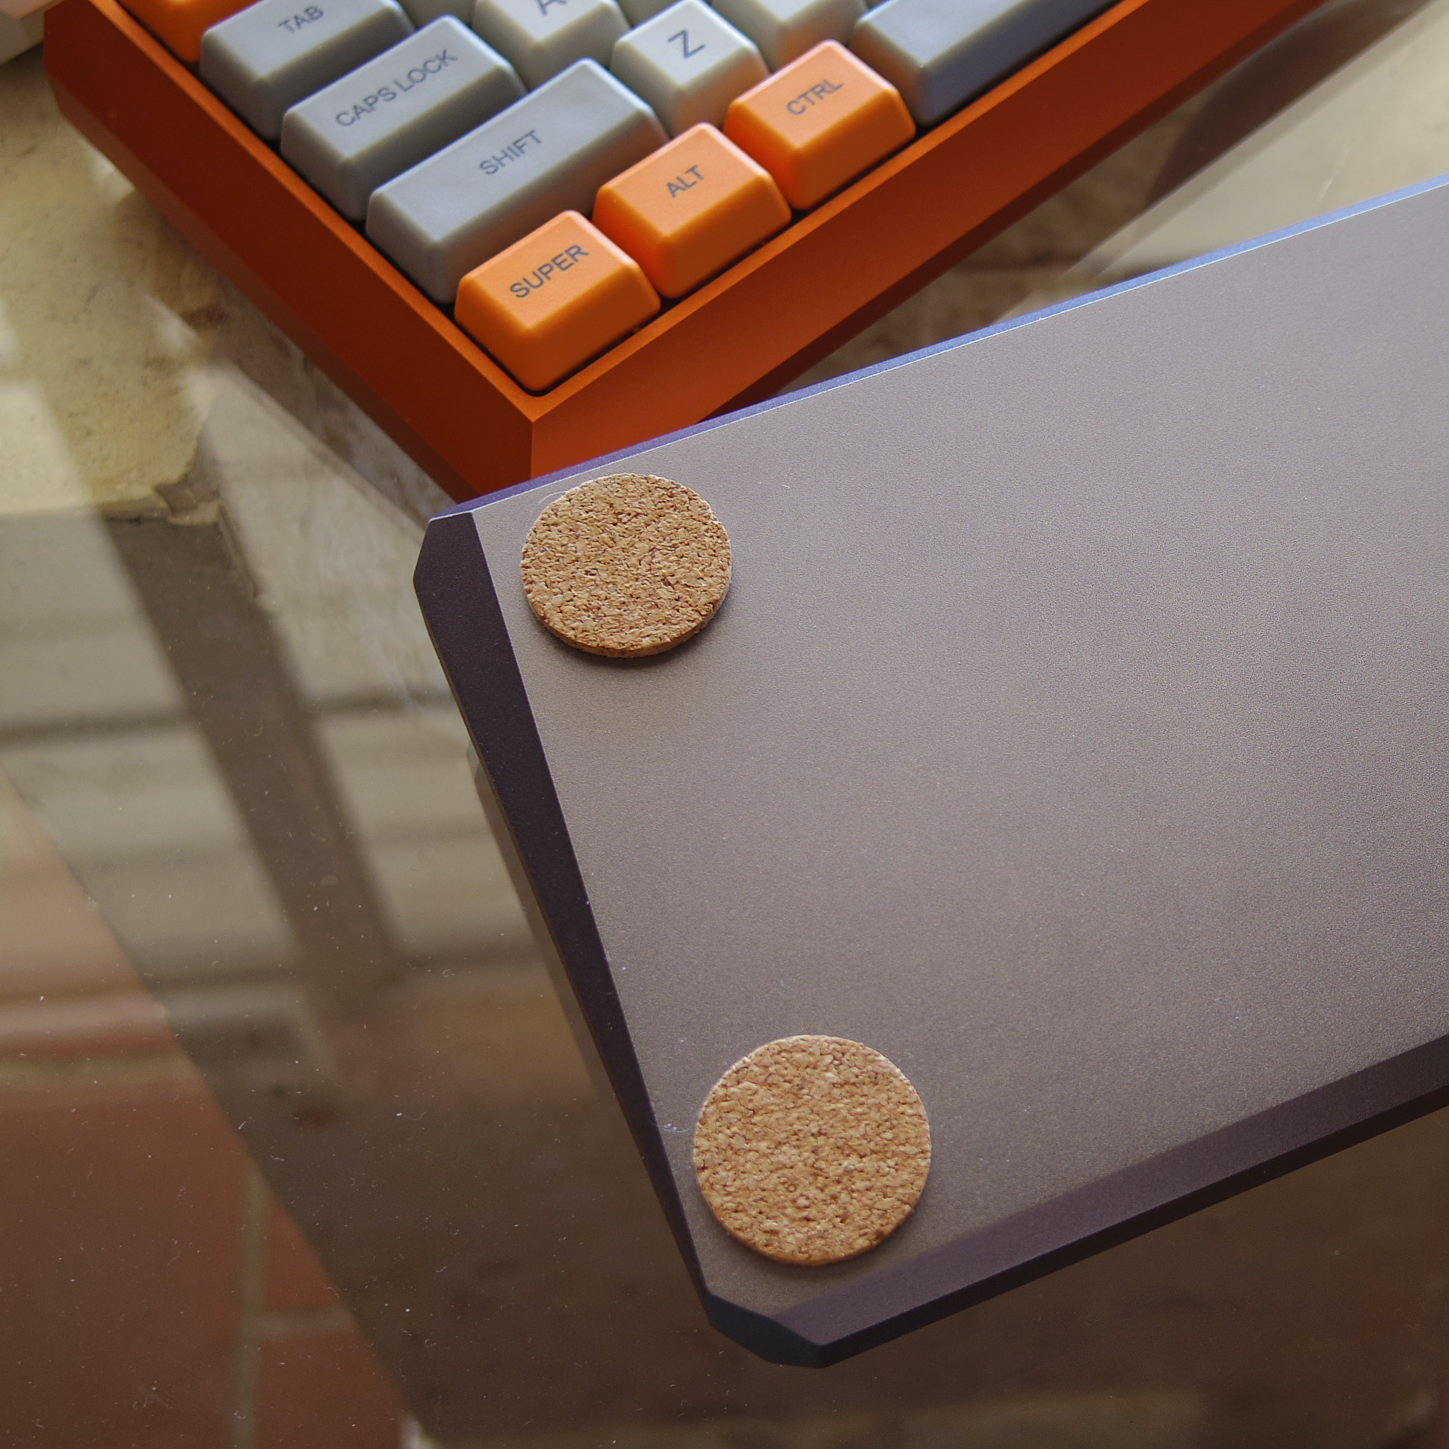
For a finishing touch, I put cork pads on the bottom of each keyboard. The 5-degree cases came with typical little rubber feet, but I feel like cork is a bit nicer and classier. My vintage IBM Model F (XT version) has cork pads. If it was good enough for IBM, it's good enough for me!
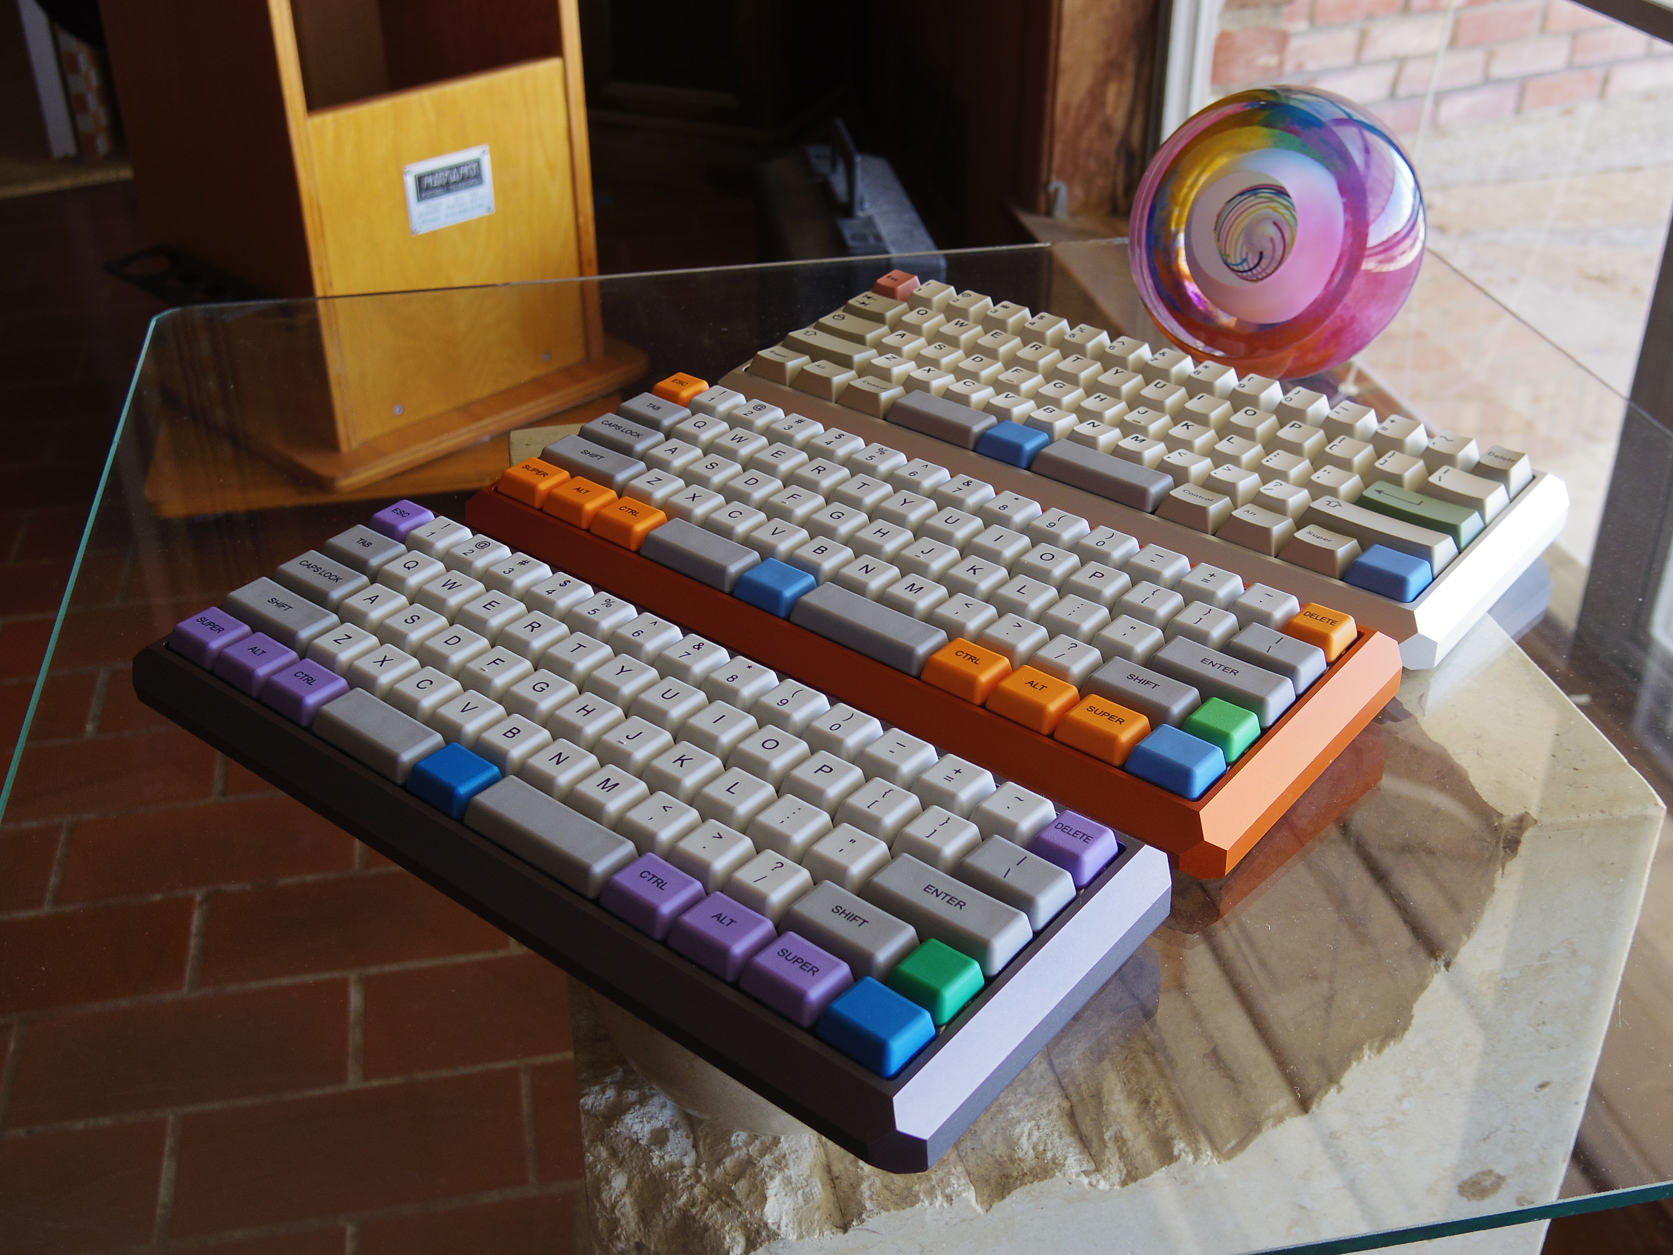
And here they are. Wait, there's three keyboards there! What gives?
Well, obviously I wasn't going to throw out the original Zo64. I got in a GMK 9009 (group buy) keycap set that I'd pre-ordered months ago, so I put it together with the Zo64 and the silver 5-degree case, and the result is pretty good. The most obvious shortcoming is that I don't have the new Compose key. However, I reprogrammed it so that tapping right-shift works as Compose, while holding the key down operates as normal shift. I was worried that I would fumble this, but it's turned out to work pretty well. I could still go back and modify the Zo64 to add that extra key and convert it to a Zo65, but I'm not sure if it's worth the effort. Also, I still have that extra DZ60 REV 2.0 board that I haven't yet used for anything!

The Banana Split 60 kits did give me a few surprises that I had to deal with. I thought USB Type-C connectors would be a fine thing, but I didn't realize how much thicker and stiffer the cables are. It does make them a little bit more awkward. Also, the cable port openings in these cases were not designed for the width of a typical Type-C connector, which meant I had to attack the cases with a rasp and open up those holes wider until the connector could enter. Finally, we were told Type-C connectors can't be put in upside-down, which is true, but it sometimes still takes me two or three tries to hit the socket, so that's not really the improvement I had expected.
Another surprise came when I was preparing to build these boards and tested the LED functionality. Unlike the DZ60, the Banana Split 60 has all its LEDs on a single circuit for backlighting, and there is no individually addressable LED for use as a Caps Lock indicator. When I asked about this, I was told that it was an oversight since neither of the guys who designed the board use Caps Lock. Oops! I decided to only install a single LED (bright green!) on each board, in the Caps Lock switch, and then use the backlighting circuit as my Caps Lock indicator. This required hacking the QMK software, which took me about a week to untangle enough to see how.
Incidentally, one of the selling points of the Banana Split 60 was supposed to be a web-based configurator, so we wouldn't have to deal with QMK layouts and compiling. I tried the configurator, and it is slick, and it is nice, but not only does it have no concept of Caps Lock, it also doesn't appear to offer the options of Mac-compatible media codes (specifically fast-forward and rewind), so it wasn't going to be of any use to me. Well, I already had QMK set up here to program other keyboards anyhow.
So... How are they working? I'm very happy and proud of how these came out. They are sleeker and more attractive than my original Zo64 build (with its original case and keycaps!), the new Compose key is handy, and the typing feel and sound are outstanding, thanks to the Sorbothane, PBT keycaps and BOX switches. I think I may actually like the tactile Burnt Orange switches even more than the clicky Pale Blues.
Is this the fabled "endgame" of keyboards for me? Well, it could be. I still have enough parts to build another 60% board here, and I have some ideas that I'm toying with in the KLE (Keyboard Layout Editor) that I might be tempted to produce someday. However, I feel like I've gone as far as I can go with off-the-shelf PCB kits. If I ever go beyond this, it's going to require either hand-wiring with a custom plate, or going to a full custom PCB, and that's a pretty big hurdle to get over, especially when I already have these keyboards in hand which are working so very well for me.